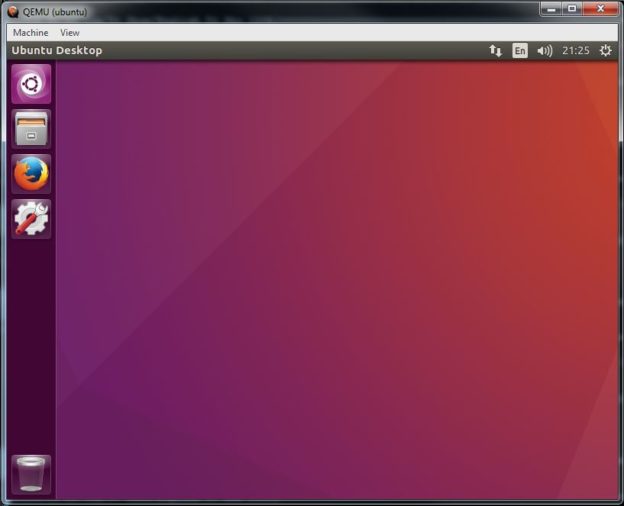
Having just gone through the exercise of getting QEmu running Ubuntu ‘Desktop’ (not Server) under Windows 7 without installing a bunch of Intel hardware virtualization driver software. I thought I’d share the process, in the hope of helping others. Note that even with the latest software acceleration enhancements (TCG), Ubuntu isn’t particularly usable as a graphical operating system under Windows 7, however it’s perfectly fine to support SSH sessions for doing linux stuff.
Honestly you are far better installing the ‘Server’ edition of Ubuntu if you just want SSH, but I viewed this as more of an ‘experiment’.
Installing Ubuntu Desktop on QEmu on Windows
- 1) Download the Windows version of QEmu, and the latest version of the Ubuntu LTS (Long term stable) iso installer image.
- 2) Install QEmu – I used the 64bit installer, so it ended up in “C:\Program Files\qemu”
- 3) Open up a CMD (command prompt)- and setup an environment variable for keeping track of the install dir. I used QEMUDIR. You might want to capture this in a batch file.
set QEMUDIR="C:\Program Files\qemu"
-
- 4) Create a empty HDD image to hold the install of the operating system – 32 gig should be enough for a basic install. It doesn’t need to be hosted on an SSD, IO is not going to be the bottleneck here.
%QEMUDIR%\qemu-img.exe create linux.img 32G
-
- 5) Launch QEmu with the empty drive and Ubuntu installer ISO mounted – follow the prompts to install Ubuntu. Note I’ve assumed that both the linux.img file we created in the earlier step and the Ubuntu iso (ubuntu-16.04.3-desktop-amd64.iso) are in the same directory.
start "QEMU" %QEMUDIR%\qemu-system-x86_64w.exe -drive file=linux.img,index=0,media=disk,format=raw -cdrom ubuntu-16.04.3-desktop-amd64.iso -m 4G -smp 4 -L Bios -usbdevice mouse -usbdevice keyboard -boot menu=on -rtc base=localtime,clock=host -parallel none -serial none -name ubuntu-no-acpi -no-hpet -no-reboot --accel tcg,thread=multi
-
- 6) Wait. This will take a long time. Not meeting someone and getting married long, but long enough that you are going to want to have something else to do.
- 7) Run QEmu against the installed image. Note – this maps port 22 (SSH) to port 2222 on the host machine. This let’s you SSH or WinSCP to access the machine.
start "QEMU" %QEMUDIR%\qemu-system-x86_64w.exe -drive file=linux.img,index=0,media=disk,format=raw -m 4G -smp 4 -L Bios -usbdevice mouse -usbdevice keyboard -boot menu=on -rtc base=localtime,clock=host -parallel none -serial none -name ubuntu -no-acpi -no-hpet -no-reboot -device e1000,netdev=user.0 -netdev user,id=user.0,hostfwd=tcp::2222-:22 --accel tcg,thread=multi
QEmu Arguments
Breaking down the QEmu command a bit
-m 4G
Four gigabytes of RAM. Adjust as required. Four gig should be enough for anyone. Consider 2G if memory is tight.
-smp 4
Emulate four CPUs. Adjust this according to the number of CPUs you have on your box – I would suggest a minimum value of two, and beyond four may not yield any benefits. Needs to be combined with the “accel thread=multi” option otherwise it’ll actually make things worse.
-accel tcg,thread=multi
Enable multi-threaded TCG acceleration – without this, it’s literally too slow to be usable. The other option is HAXM acceleration, which requires installing an Intel driver bundle.
-device e1000,netdev=user.0 -netdev user,id=user.0,hostfwd=tcp::2222-:22
Add a simulated e1000 network device. We could use the virtio device for lower CPU usage, but e1000 is more compatible with other images. Maybe you want to run Plan 9 as well.
Also map port 22 on the guest operating system to port 2222 on the host, this will allow us to SSH/WinSCP in.
After The First Login
First off you need to disable the eye-candy effects on the desktop. They eat CPU cycles, and make everything sluggish.
Drop any of the apps from the taskbar that you aren’t going to use (right click on each). Forget about using Firefox.
Most of this is obvious, but some of it can only be shutdown by installing ‘ccsm’, a secondary control panel thus.
sudo apt-get install compizconfig-settings-manager
Once that’s installed (you can invoke it via):
sudo ccsm
Disable the lock screen by increasing the lock screen timeout to forever. For some reason the lock screen uses a crazy amount of CPU to render.
Finally
sudo apt-get upgrade
And then wait some more.

